Basic motion detection and tracking with Python and OpenCV
I mounted a Raspberry Pi to the top of my kitchen cabinets to automatically detect if he tried to pull that beer stealing shit again:
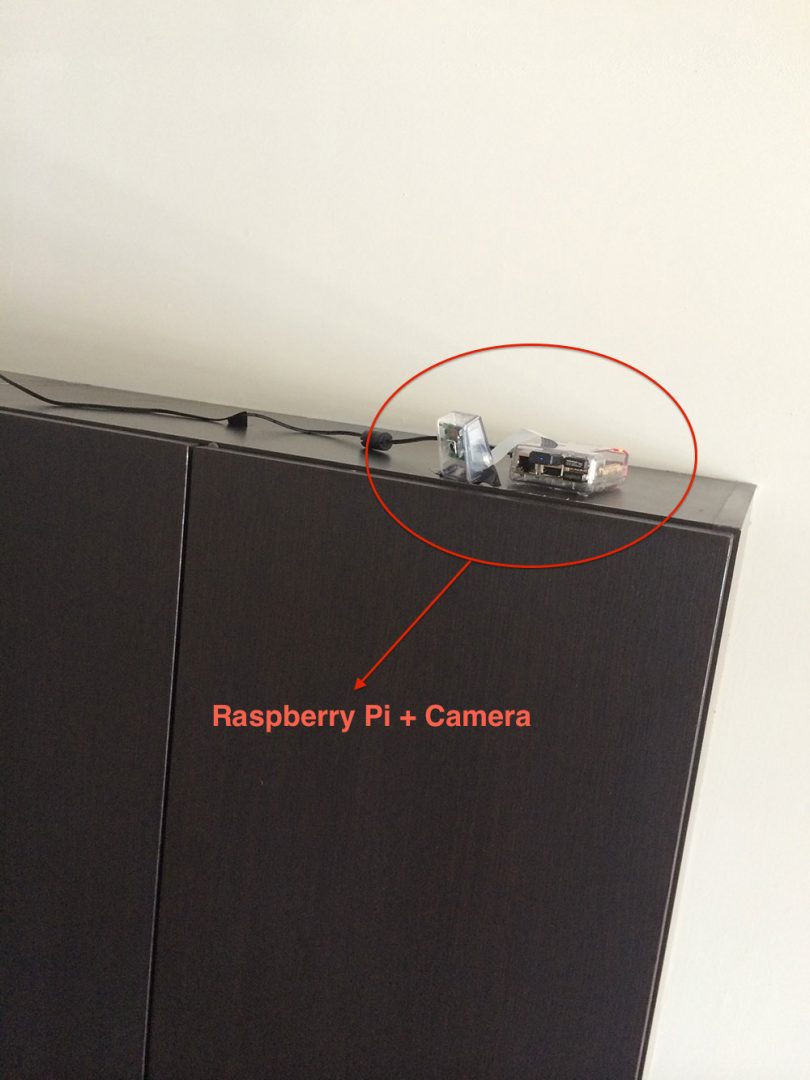
Figure 1: Don’t steal my damn beer. Otherwise I’ll mount a Raspberry Pi + camera on top of my kitchen cabinets and catch you.
Excessive?
Perhaps.
But I take my beer seriously. And if James tries to steal my beer again, I’ll catch him redhanded.
OpenCV and Python versions:
In order to run this example, you’ll need Python 2.7 and OpenCV 2.4.X.
In order to run this example, you’ll need Python 2.7 and OpenCV 2.4.X.
A 2-part series on motion detection
This is the first post in a two part series on building a motion detection and tracking system for home surveillance.
The remainder of this article will detail how to build a basic motion detection and tracking system for home surveillance using computer vision techniques. This example will work with both pre-recorded videos and live streams from your webcam; however, we’ll be developing this system on our laptops/desktops.
In the second post in this series I’ll show you how to update the code to work with your Raspberry Pi and camera board — and how to extend your home surveillance system to capture any detected motion and upload it to your personal Dropbox.
And maybe at the end of all this we can catch James red handed…
A little bit about background subtraction
Background subtraction is critical in many computer vision applications. We use it to count the number of cars passing through a toll booth. We use it to count the number of people walking in and out of a store.
And we use it for motion detection.
Before we get started coding in this post, let me say that there are many, many ways to perform motion detection, tracking, and analysis in OpenCV. Some are very simple. And others are very complicated. The two primary methods are forms of Gaussian Mixture Model-based foreground and background segmentation:
- An improved adaptive background mixture model for real-time tracking with shadow detection by KaewTraKulPong et al., available through thecv2.BackgroundSubtractorMOG function.
- Improved adaptive Gaussian mixture model for background subtraction by Zivkovic, and Efficient Adaptive Density Estimation per Image Pixel for the Task of Background Subtraction, also by Zivkovic, available through the cv2.BackgroundSubtractorMOG2 function.
And in newer versions of OpenCV we have Bayesian (probability) based foreground and background segmentation, implemented from Godbehere et al.’s 2012 paper, Visual Tracking of Human Visitors under Variable-Lighting Conditions for a Responsive Audio Art Installation. We can find this implementation in the cv2.createBackgroundSubtractorGMG function (we’ll be waiting for OpenCV 3 to fully play with this function though).
All of these methods are concerned with segmenting the background from the foreground (and they even provide mechanisms for us to discern between actual motion and just shadowing and small lighting changes)!
So why is this so important? And why do we care what pixels belong to the foreground and what pixels are part of the background?
Well, in motion detection, we tend to make the following assumption:
The background of our video stream is largely static and unchanging over consecutive frames of a video. Therefore, if we can model the background, we monitor it for substantial changes. If there is a substantial change, we can detect it — this change normally corresponds to motion on our video.
Now obviously in the real-world this assumption can easily fail. Due to shadowing, reflections, lighting conditions, and any other possible change in the environment, our background can look quite different in various frames of a video. And if the background appears to be different, it can throw our algorithms off. That’s why the most successful background subtraction/foreground detection systems utilize fixed mounted cameras and in controlled lighting conditions.
The methods I mentioned above, while very powerful, are also computationally expensive. And since our end goal is to deploy this system to a Raspberry Pi at the end of this 2 part series, it’s best that we stick to simple approaches. We’ll return to these more powerful methods in future blog posts, but for the time being we are going to keep it simple and efficient.
In the rest of this blog post, I’m going to detail (arguably) the most basic motion detection and tracking system you can build. It won’t be perfect, but it will be able to run on a Pi and still deliver good results.
Basic motion detection and tracking with Python and OpenCV
Alright, are you ready to help me develop a home surveillance system to catch that beer stealing jackass?
Open up a editor, create a new file, name it motion_detector.py , and let’s get coding:
Lines 2-6 import our necessary packages. All of these should look pretty familiar, except perhaps the imutils package, which is a set of convenience functions that I have created to make basic image processing tasks easier. If you do not already have imutils installed on your system, you can install it via pip: pip install imutils .
Next up, we’ll parse our command line arguments on Lines 9-12. We’ll define two switches here. The first, --video , is optional. It simply defines a path to a pre-recorded video file that we can detect motion in. If you do not supply a path to a video file, then OpenCV will utilize your webcam to detect motion.
We’ll also define --min-area , which is the minimum size (in pixels) for a region of an image to be considered actual “motion”. As I’ll discuss later in this tutorial, we’ll often find small regions of an image that have changed substantially, likely due to noise or changes in lighting conditions. In reality, these small regions are not actual motion at all — so we’ll define a minimum size of a region to combat and filter out these false-positives.
Lines 15-21 handle grabbing a reference to our camera object. In the case that a video file path is not supplied (Lines 15-17), we’ll grab a reference to the webcam. And if a video file issupplied, then we’ll create a pointer to it on Lines 20 and 21.
Lastly, we’ll end this code snippet by defining a variable called firstFrame .
Any guesses as to what firstFrame is?
If you guessed that it stores the first frame of the video file/webcam stream, you’re right.
Assumption: The first frame of our video file will contain no motion and just background — therefore, we can model the background of our video stream using only the first frame of the video.
Obviously we are making a pretty big assumption here. But again, our goal is to run this system on a Raspberry Pi, so we can’t get too complicated. And as you’ll see in the results section of this post, we are able to easily detect motion while tracking a person as they walk around the room.
So now that we have a reference to our video file/webcam stream, we can start looping over each of the frames on Line 27.
A call to camera.read() returns a 2-tuple for us. The first value of the tuple is grabbed , indicating whether or not the frame was successfully read from the buffer. The second value of the tuple is the frame itself.
We’ll also define a string named text and initialize it to indicate that the room we are monitoring is “Unoccupied”. If there is indeed activity in the room, we can update this string.
And in the case that a frame is not successfully read from the video file, we’ll break from the loop on Lines 35 and 36.
Now we can start processing our frame and preparing it for motion analysis (Lines 39-41). We’ll first resize it down to have a width of 500 pixels — there is no need to process the large, raw images straight from the video stream. We’ll also convert the image to grayscale since color has no bearing on our motion detection algorithm. Finally, we’ll apply Gaussian blurring to smooth our images.
It’s important to understand that even consecutive frames of a video stream will not be identical!
Due to tiny variations in the digital camera sensors, no two frames will be 100% the same — some pixels will most certainly have different intensity values. That said, we need to account for this and apply Gaussian smoothing to average pixel intensities across an 21 x 21 region (Line 41). This helps smooth out high frequency noise that could throw our motion detection algorithm off.
As I mentioned above, we need to model the background of our image somehow. Again, we’ll make the assumption that the first frame of the video stream contains no motion and is a good example of what our background looks like. If the firstFrame is not initialized, we’ll store it for reference and continue on to processing the next frame of the video stream (Lines 44-46).
Here’s an example of the first frame of an example video:
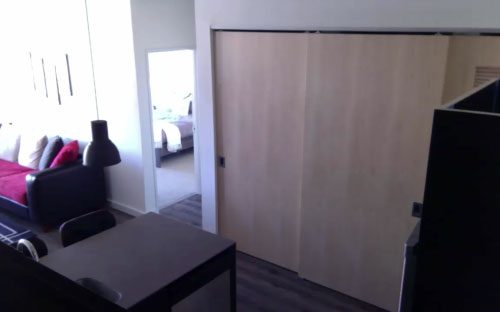
Figure 2: Example first frame of a video file. Notice how it’s a still-shot of the background, no motion is taking place.
The above frame satisfies the assumption that the first frame of the video is simply the static background — no motion is taking place.
Given this static background image, we’re now ready to actually perform motion detection and tracking:
Now that we have our background modeled via the firstFrame variable, we can utilize it to compute the difference between the initial frame and subsequent new frames from the video stream.
Computing the difference between two frames is a simple subtraction, where we take the absolute value of their corresponding pixel intensity differences (Line 50):
delta = |background_model – current_frame|
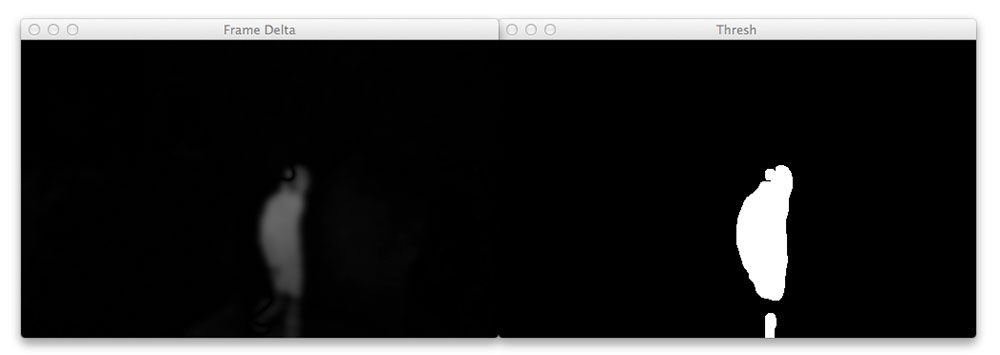
An example of a frame delta can be seen below:
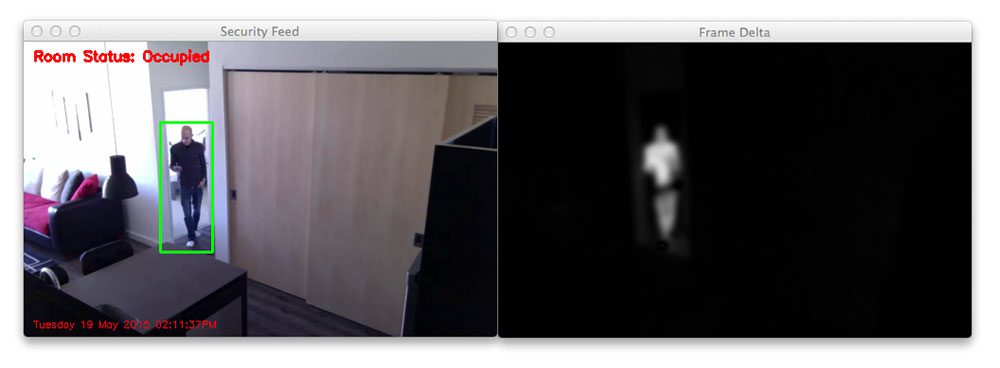
Figure 3: An example of the frame delta, the difference between the original first frame and the current frame.
Notice how the background of the image is clearly black. However, regions that contain motion (such as the region of myself walking through the room) is much lighter. This implies that larger frame deltas indicate that motion is taking place in the image.
We’ll then threshold the frameDelta on Line 51 to reveal regions of the image that only have significant changes in pixel intensity values. If the delta is less than 25, we discard the pixel and set it to black (i.e. background). If the delta is greater than 25, we’ll set it to white (i.e. foreground). An example of our thresholded delta image can be seen below:
Again, note that the background of the image is black, whereas the foreground (and where the motion is taking place) is white.
Given this thresholded image, it’s simple to apply contour detection to to find the outlines of these white regions (Line 56).
We start looping over each of the contours on Line 60, where we’ll filter the small, irrelevant contours on Line 62 and 63.
If the contour area is larger than our supplied --min-area , we’ll draw the bounding box surrounding the foreground and motion region on Lines 67 and 68. We’ll also update ourtext status string to indicate that the room is “Occupied”.
The remainder of this example simply wraps everything up. We draw the room status on the image in the top-left corner, followed by a timestamp (to make it feel like “real” security footage) on the bottom-left.
Lines 77-80 display the results of our work, allowing us to visualize if any motion was detected in our video, along with the frame delta and thresholded image so we can debug our script.
Note: If you download the code to this post and intend to apply it to your own video files, you’ll likely need to tune the values for cv2.threshold and the --min-area argument to obtain the best results for your lighting conditions.
Finally, Lines 88 and 89 cleanup and release the video stream pointer.
Results
Obviously I want to make sure that our motion detection system is working before James, the beer stealer, pays me a visit again — we’ll save that for Part 2 of this series. To test out our motion detection system using Python and OpenCV, I have created two video files.
The first, example_01.mp4 monitors the front door of my apartment and detects when the door opens. The second, example_02.mp4 was captured using a Raspberry Pi mounted to my kitchen cabinets. It looks down on the kitchen and living room, detecting motion as people move and walk around.
Let’s give our simple detector a try. Open up a terminal and execute the following command:
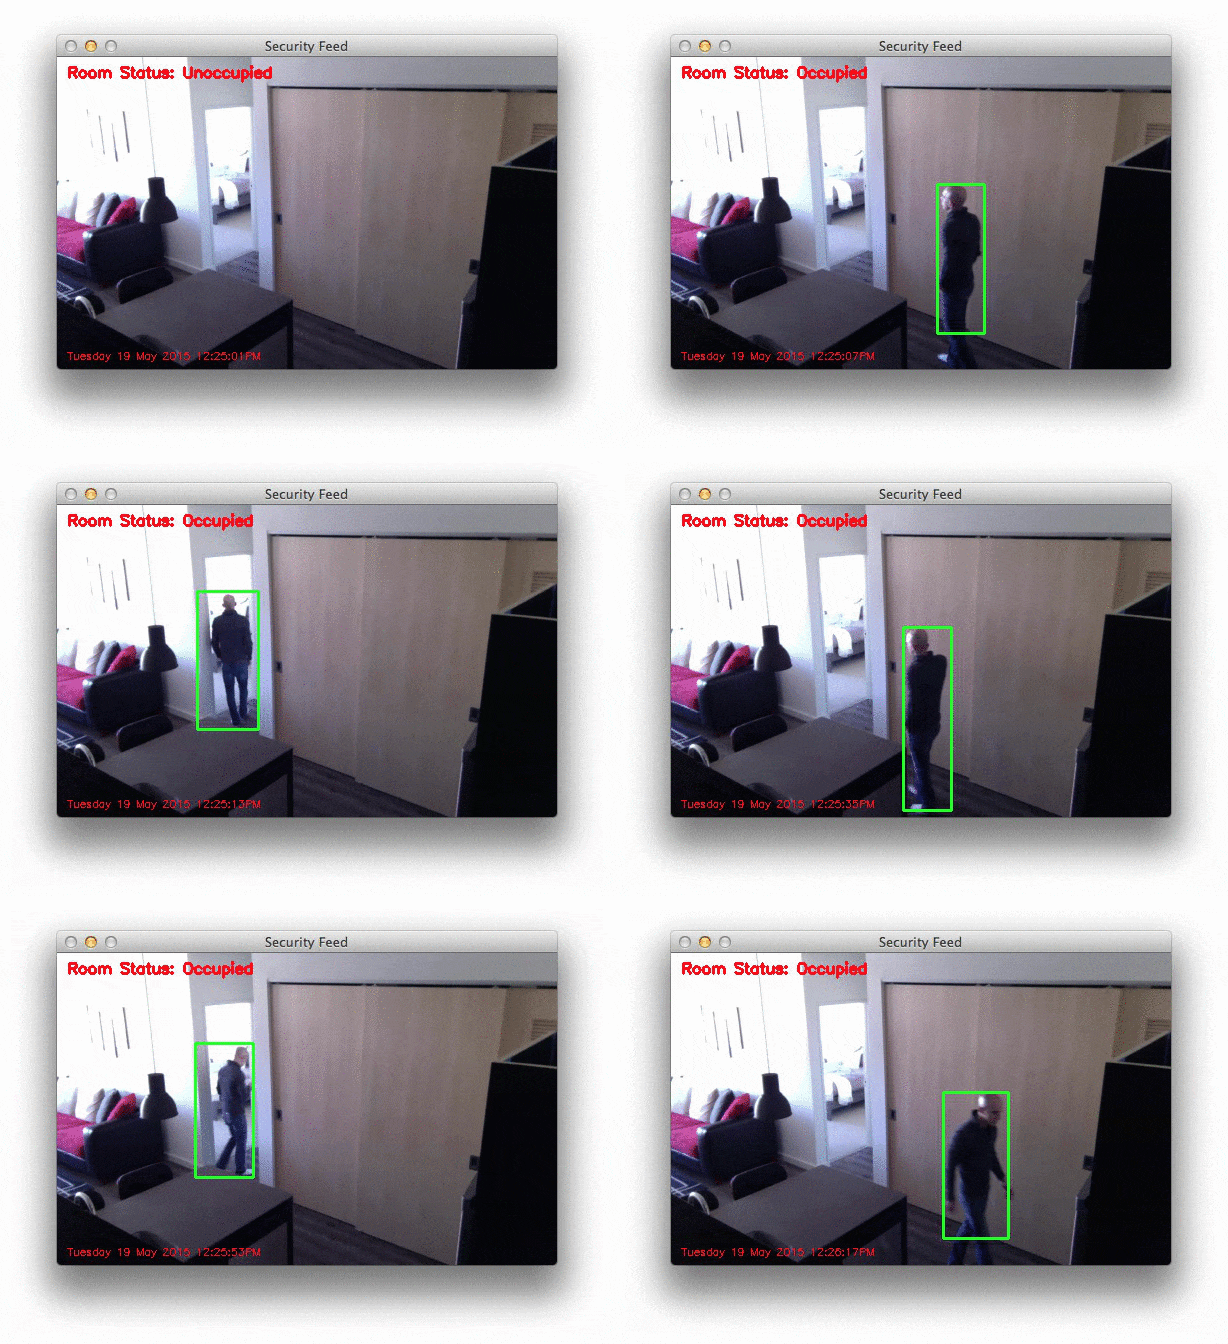
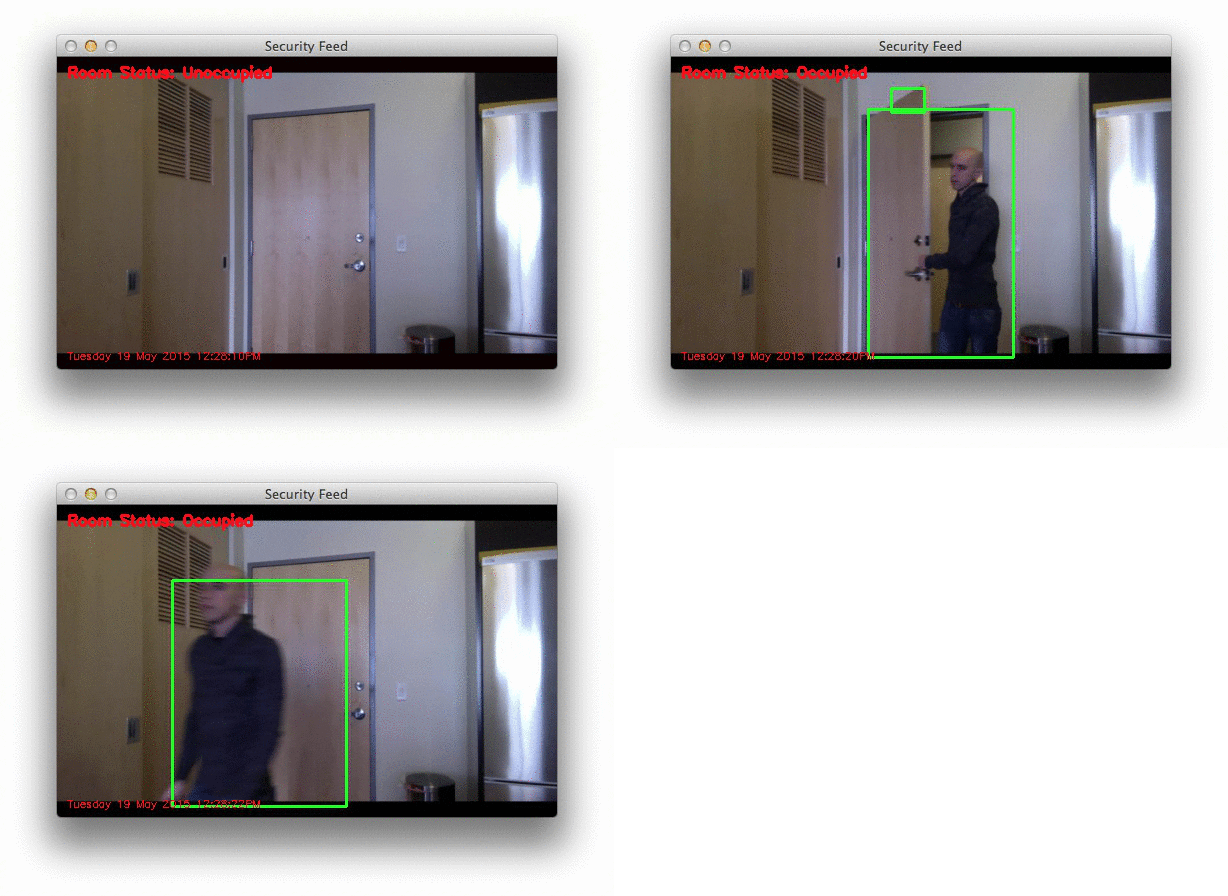
Below is a .gif of a few still frames from the motion detection:
Notice how that no motion is detected until the door opens — then we are able to detect myself walking through the door. You can see the full video here:
Now, what about when I mount the camera such that it’s looking down on the kitchen and living room? Let’s find out. Just issue the following command:
A sampling of the results from the second video file can be seen below:
And again, here is the full vide of our motion detection results:
So as you can see, our motion detection system is performing fairly well despite how simplistic it is! We are able to detect as I am entering and leaving a room without a problem.
However, to be realistic, the results are far from perfect. We get multiple bounding boxes even though there is only one person moving around the room — this is far from ideal. And we can clearly see that small changes to the lighting, such as shadows and reflections on the wall, trigger false-positive motion detections.
To combat this, we can lean on the more powerful background subtractions methods in OpenCV which can actually account for shadowing and small amounts of reflection (I’ll be covering the more advanced background subtraction/foreground detection methods in future blog posts).
But for the meantime, consider our end goal.
This system, while developed on our laptop/desktop systems, is meant to be deployed to a Raspberry Pi where the computational resources are very limited. Because of this, we need to keep our motion detection methods simple and fast. An unfortunate downside to this is that our motion detection system is not perfect, but it still does a fairly good job for this particular project.
Finally, if you want to perform motion detection on your own raw video stream from your webcam, just leave off the --video switch:
Summary
In this blog post we found out that my friend James is a beer stealer. What an asshole.
And in order to catch him red handed, we have decided to build a motion detection and tracking system using Python and OpenCV. While basic, this system is capable of taking video streams and analyzing them for motion while obtaining fairly reasonable results given the limitations of the method we utilized.
The end goal if this system is to deploy it to a Raspberry Pi, so we did not leverage some of the more advanced background subtraction methods in OpenCV. Instead, we relied on a simple yet reasonably effective assumption — that the first frame of our video stream contains the background we want to model and nothing more.
Under this assumption we were able to perform background subtraction, detect motion in our images, and draw a bounding box surrounding the region of the image that contains motion.
In the second part of this series on motion detection, we’ll be updating this code to run on the Raspberry Pi.
We’ll also be integrating with the Dropbox API, allowing us to monitor our home surveillance system and receive real-time updates whenever our system detects motion.
Stay tuned!
Comments
Post a Comment